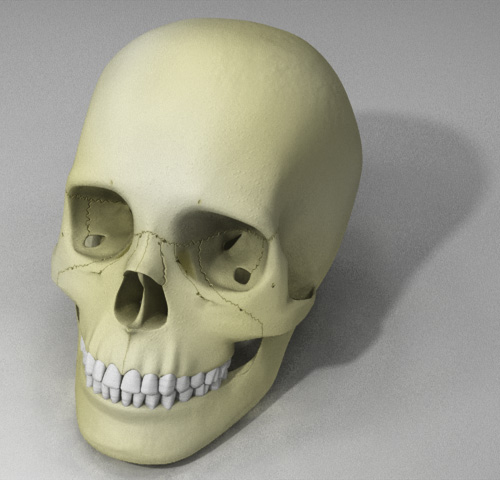
Diary of a Skull Man
A big reason why I redid my website almost 2 years ago was to make posting new stuff easier. To be honest, I think it is easier, it’s just that I have a lot less free time than I used to post new material. But here is something new (relatively, anyway), and it is a grand crossover between my top level categorizations - an article about my artwork. I’m not sure what the outcome of this set of articles will be, since I haven’t defined an endpoint, but I hope you’ll stick around for it.
I’ve loved, studied and drawn dinosaurs since high school, and while many people know this, I suspect few know exactly where this love came from. Granted, I’m not entirely sure I can tell you either since love likely doesn’t have an easily traceable origin, however, I can provide some context for my interest in them. Most people assume that I simply never let go a childhood admiration for dinosaurs, and I doubt I ever relinquished this love completely, but it had significantly waned in my adolescence, replaced by an intense interest in comparative anatomy. That itself began a few years earlier when I started copying drawings out of a human anatomy textbook. I enjoyed gaining a clearer understanding of the underlying structures I had been trying to draw in the various comic book characters I was creating. After making these drawings with a sort of blinders on where all I did was copy these drawings completely uncritically, I began to notice all the analogs in other animals, whether it was a household pet, a wild animal I’d come into contact with, a museum mount or roadkill that I’d encounter on my walk home from school. I was fascinated by all of it and I began studying and drawing these subjects.
When I then watched Jurassic Park, I was completely blown away. Not because of the by-the-numbers hubris narrative or the silly characters, but because of the dinosaurs. They had been so vividly created by ILM, they seemed absolutely life-like. I had the same sort of comparative anatomy experience I’d had with other extant fauna so recently. They ignited my imagination where everything familiar about anatomy became shocking, alien and monstrous and yet still retained the same beauty I’d come to admire.
After so many years of devoting myself to dinosaurs, I wanted to revisit those first moments of pleasure of drawing the human skull. It was the skull that I found most compelling to draw, and I found myself doodling it more and more often. Looking over what I had published in the last 10 years, I realized it was time to make a 3D model of a human skull.
The Background
Step 1: Take a step backwards.
This being the Internet, of course what I told you wasn’t completely true. The fact is, I had tried once before to model a human skull, but I got stuck. Here are AO (Ambiance Occlusion) and wireframe renderings of a skull I began working on in mid-2001.
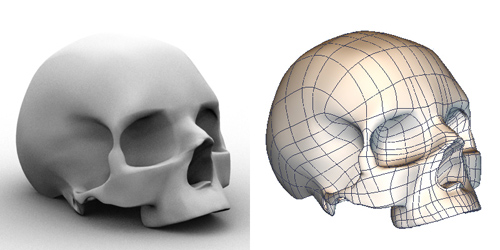
Obviously, I never refined it. There are many lumps and surfacing defects that would have eventually been worked away during a tweaking process, but I never got there. There were 3 basic reasons for this:
- The area between the eye socket and the nasal cavity. I had created a ridge there due to my modeling process that didn’t belong there and that I couldn’t figure out how to get rid of. This area would have required extensive remodeling, and at the time, I wasn’t sure how I would be able to do it. In other words, This little area represented the limit of my modeling knowledge.
- The many processes, fenestra, and holes at the bottom of the skull. There are dozens of bewildering features on the underside of the cranium and I wasn’t sure that I would be able to make them satisfactorily, but more importantly, I knew that I couldn’t complete them in any decent amount of time.
- The overall look of the skull was wrong. I had been working from reference images as rotoscopes. As a result, the shapes that I was making were too faithful to those images but making a wrong impression of the actual object. It was turning out to be too much of a bad copy.
I had gone too far with it to fix its defects and felt too discouraged by having met my own limitations so clearly. I set it aside and hoped that I would return to it one day.
One Day/Day One
The day had arrived.
One day finally arrived in April 2010. I needed to have a little cartoony skull for a background element for a game. I felt some trepidation because I knew where I wound up almost 10 years earlier. However, I gathered up the confidence I gained in the interim and started working. The main difference this time would be the approach itself.
- I didn’t need accuracy. This was going to be a tiny background element, no more than about 50 pixels wide. That left a huge margin of error. I wasn’t even sure at first if I should even bother modeling it and thought long and hard about whether I should simply draw it, since I knew that I could. I quickly decided to model it, however, because I wasn’t totally sure what I would be doing with the skull, and the 3D model would offer many more animation opportunities.
- I started with primitives. When I began last time, and, it merits noting, with most of my models, I began by rotoscoping the major lines of the model. This time, I began with a ball and started extruding and making divots. To many, perhaps even most modelers, this approach might not seem that novel, but for me it was because, not only do I not usually work that way, but this approach is, in general, a little more difficult with Animation:Master, my chosen animation package. Its use of splines makes “drawing” a model a bit more intuitive than beginning with a lump of primitives and working them into your desired shape.
So within a few hours I created this:
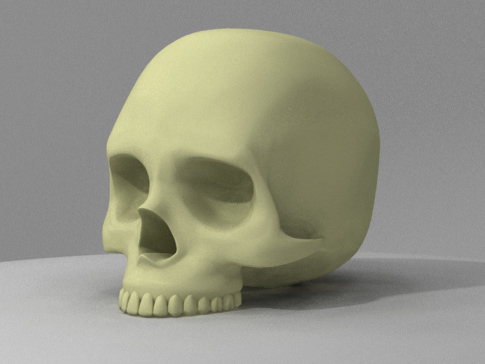
For those of my readers to whom this may mean something, the whole model is only about 1300 patches, with only 500 being devoted to the head itself, the rest is all teeth.
I had accomplished what I set out to do with this model, but beyond that I also liked it and thought that it had immense potential for improvement.
The Third Beginning
Let’s get on with this, already.
And so, as so often happens to me, I couldn’t leave it alone. I kept seeing what looked to me flaws that had relatively easy solutions, given this current set-up. I felt like I had already cleared all the difficult hurdles and all that I needed to do was refine and tweak, so I easily convinced myself to spend a little more time on it and see if I could make a really nice skull.
With about another 10 hours of work I got this far.
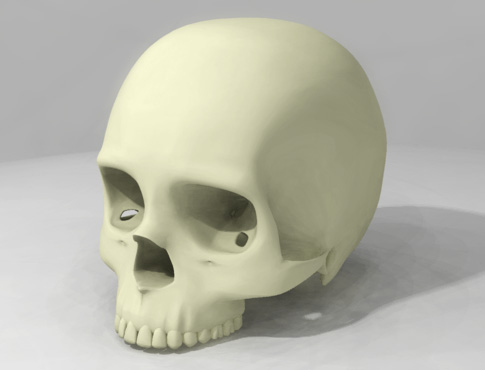
I did quite a lot for this revision. Most notably cutting out the superior and inferior orbital fissures (the holes in the eyes). I also added the nasal spine (the little lip that goes into nasal cavity) and the infraorbital foramen (the little holes right under the eyes). In addition, I added detail right above the teeth giving them some of their signature bumpiness and did a lot smoothing and refining on the rest of the shape. I also added the external auditory meatus (the ear hole), that you can’t really see in the above image.
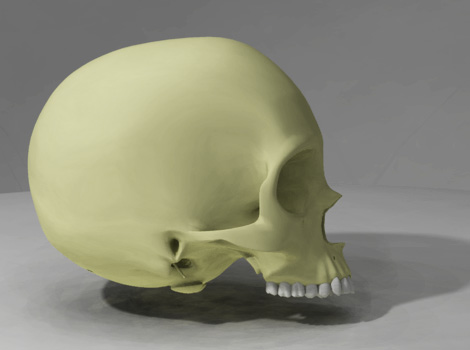
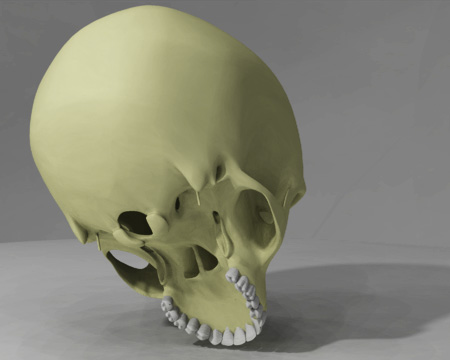
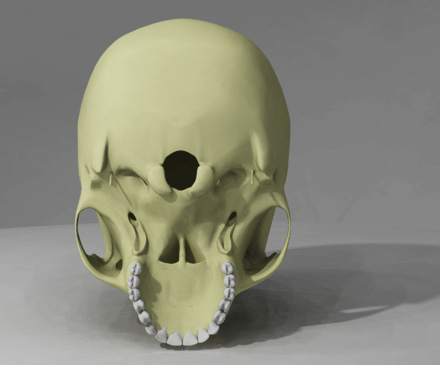
Here are a few realtime renders of the skull from 3 different vantage points to show off the improved shape and added details. The auditory meatus is visible here and so are the mastoid processes on the underside of the skull.
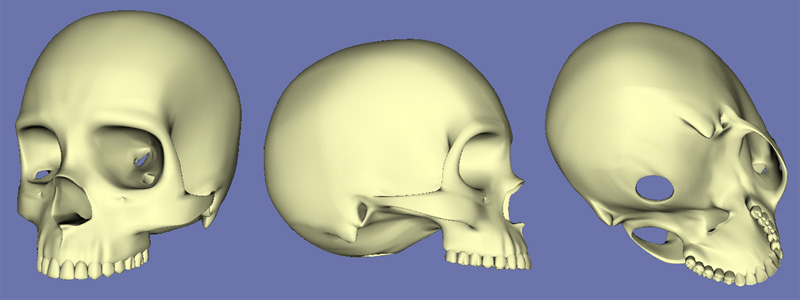
The area that provided for the biggest modeling challenge was adding the inferior orbital fissure, the hole that goes from inside the eye socket to the back side of the zygomatic bone (the cheek bone). This area had to be thinned out and reshaped considerably from my original pass because it is such a complex shape.
Adding and Refining
Trying to make things better without making them worse.
At this stage, I started refining the skull as a bit of procrastination. I knew that I’d have to tackle that all-important underside, and I still hadn’t quite gathered up the courage to do so. I added a bit of texture to and changed the color of the teeth, and reshaped the maxilla (the area between the teeth and nose) a bit. But I also knew that if I was too timid about it, I might never get around to doing it at all, so I started slow and easy and added the styloid processes (the thin protrusions right under the ear area). Here is the result.
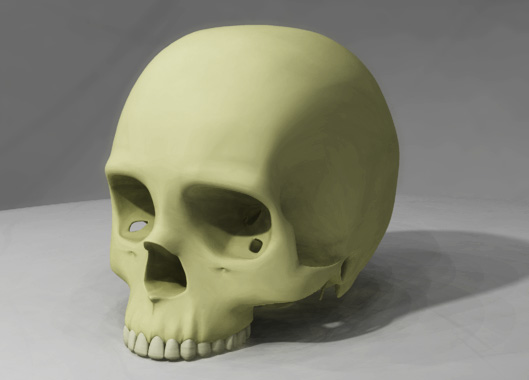
Feeling emboldened by this, I thought I could move on to another simple structure, the occipital condyles, the two structures that sit just outside the foramen magnum, the large hole at the bottom of the skull which connects to the spine. That went well, so it was time to add the last major facial structure, the septum. From there, I moved on to the pterygoid processes, the indentations that sit right above the last molars. (By the way, at this point the landmarks will get more confusing. I’ll do what I can to be as clear as possible, but this is the reason that all these structures have names. Sorry about that.) I moved there because, again it was a relatively simple extrusion from the existing model. But this was also where things started to get trickier, because it was now time to start adding holes.
The skull has many holes, ‘foramina’ (singular ‘foramen’), and in Animation:Master you really have to add them to the structure. In many other modeling packages, you can subtract holes, meaning you can build some shape, say a column, insert that somewhere into your model and then perform a boolean operation to subtract that shape from the model. The software figures out what the resulting shape should look like. That same process doesn’t exactly work in Animation:Master because its reliance on patch technology where a patch, a 3, 4, or 5 point surface, is strictly defined. Instead, you draw a spline somewhere near the model surface in, at least, the approximate shape of your hole, then disconnect the splines from the existing surface and reconnect them to this new spline through a process called ‘stitching’. Because this can be laborious and often baffling, I was dreading it.
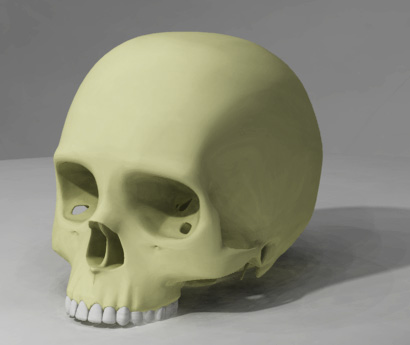
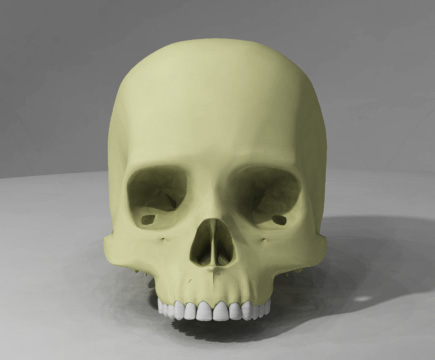
However, I felt like I had done very good prep work. I was taking things slow and proceeding methodically. I added jugular and ovale foramina with not too much effort. Here are 5 different images of the same stage of modeling to show my progress.
The Jaw
You gotta have a trap before you can shut it.
By this time, I was feeling very good about what I had created. I knew there were more foramina to make, but I also knew how easy it is to lose the forest for the trees in the refining process. I needed the last major landmark that would help me continue to reshape my model until it felt just right: the jaw. Every new addition helps recast what’s already made in a new light and can help highlight areas I’ve forgotten, neglected or simply didn’t notice weren’t right.
The jaw was trickier than I thought it would be. The teeth by themselves took a great deal of time. It was specifically during the modeling of the teeth that I lamented that I wasn’t modeling a predatory dinosaur. Their teeth are very uniform, and a simple copy-paste-resize-move procedure is usually enough to get you your dinosaur teeth. Human, as well as most mammals, have very elaborately and uniquely shaped teeth. Making them is a great modeling challenge, in this case, of making subtle variations on its neighbors.
Here is where I landed with the jaw after my initial pass:
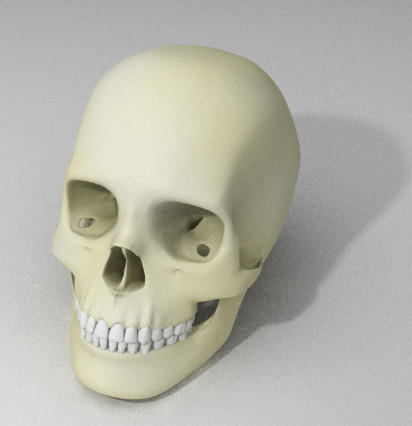
Now the time had also come to start adding in some texture, both in the sense of adding general bumps and pits, but also for features of the skull that I wouldn’t be able to model. I created a bump map for the front of the skull which created sutures for the various facial bones, but I also used this approach to create the divot for the lacrimosal bone (the small bone just inside the eye socket closest to the nasal bridge), as well as the pin hole foramina that surround the eye socket.
